Rega
Rega RB880 Tonearm
Rega RB880 Tonearm
Couldn't load pickup availability
In Stock At Warehouse - Despatched 2 - 3 Days
In Stock At Warehouse - Despatched 2 - 3 Days
Quick Info
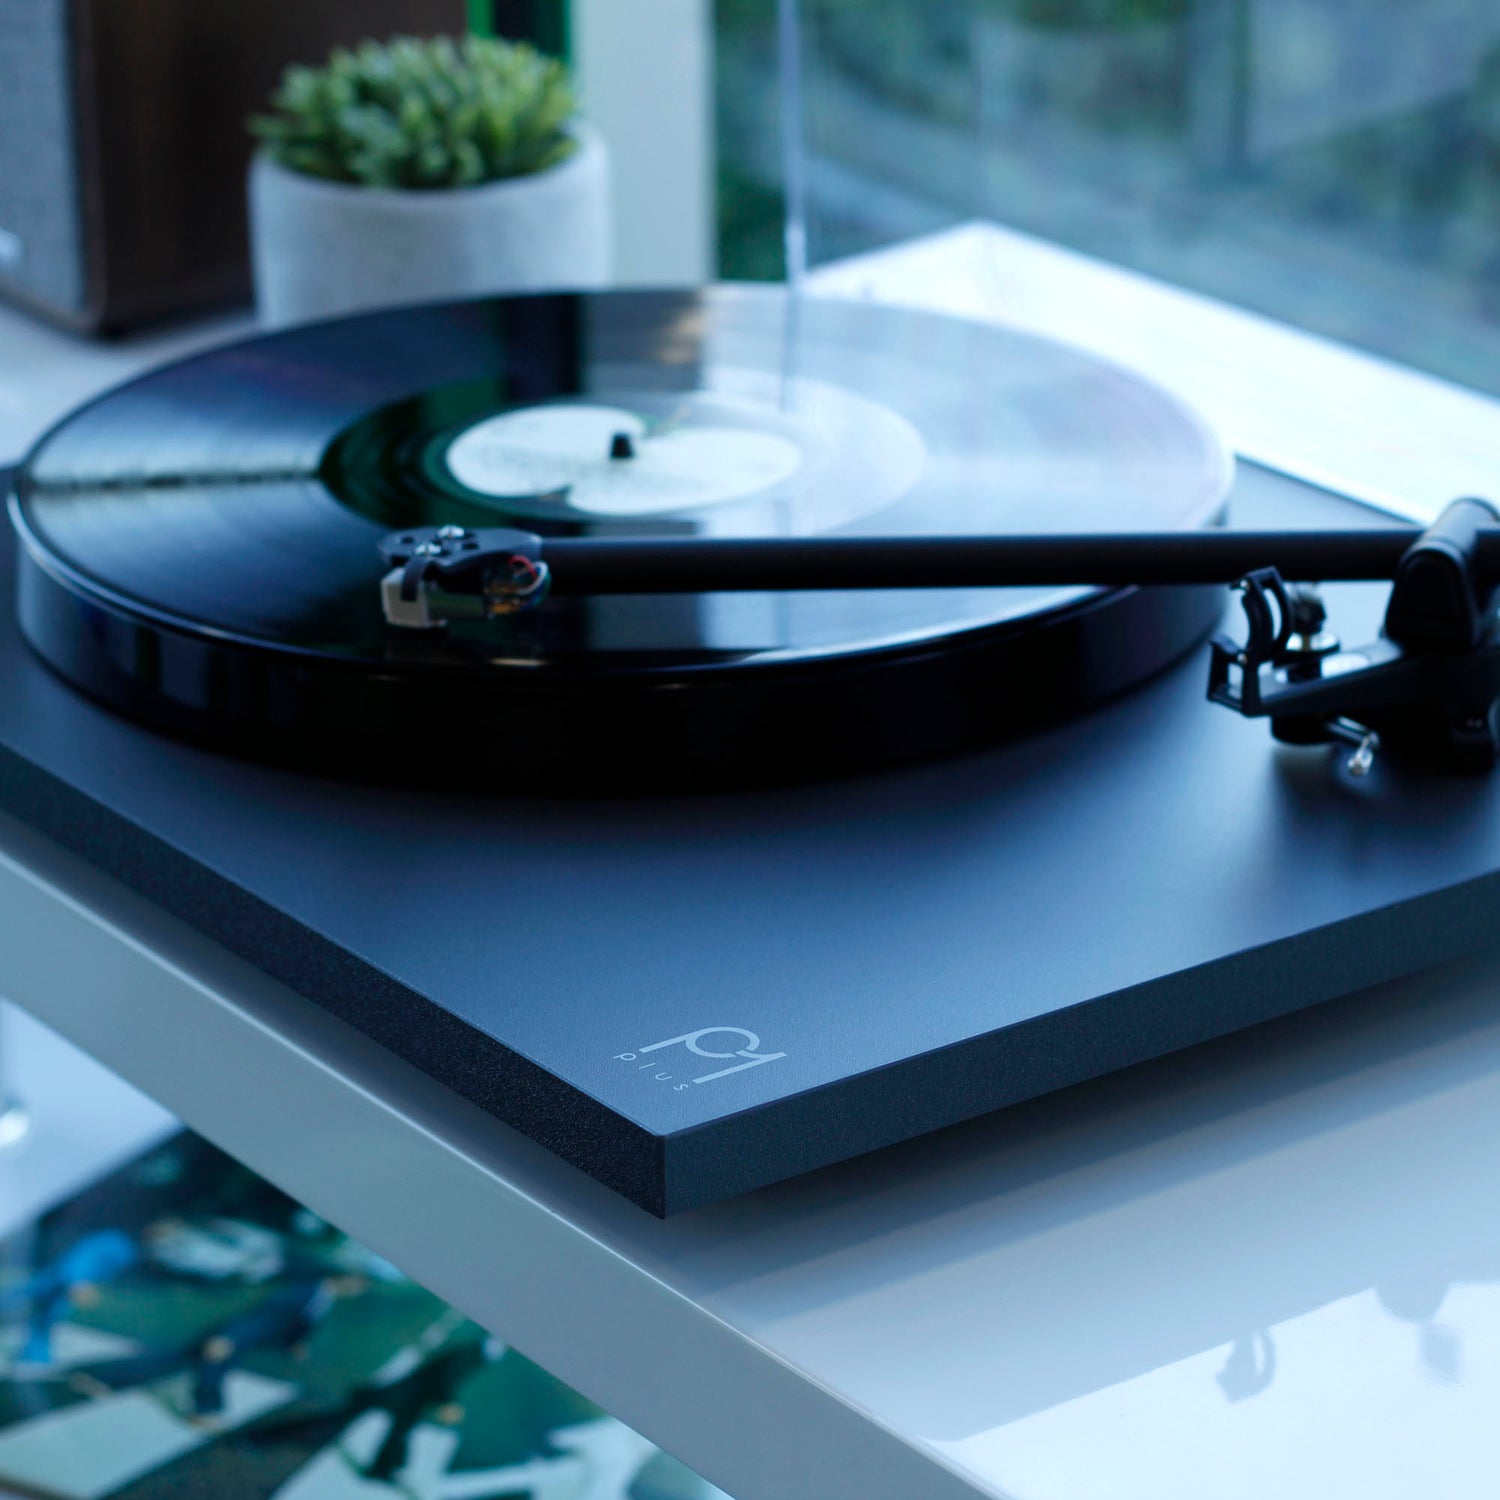
Quality One-Piece Tonearm Featured On The Rega Planar 8 Turntable
Matt Black Finish, Zero Tolerance Bearing
Ideal For Rega Ania & Apheta Moving Coil Cartridges
Designed & Manufactured in Essex, UK
About The Rega RB880 Tonearm
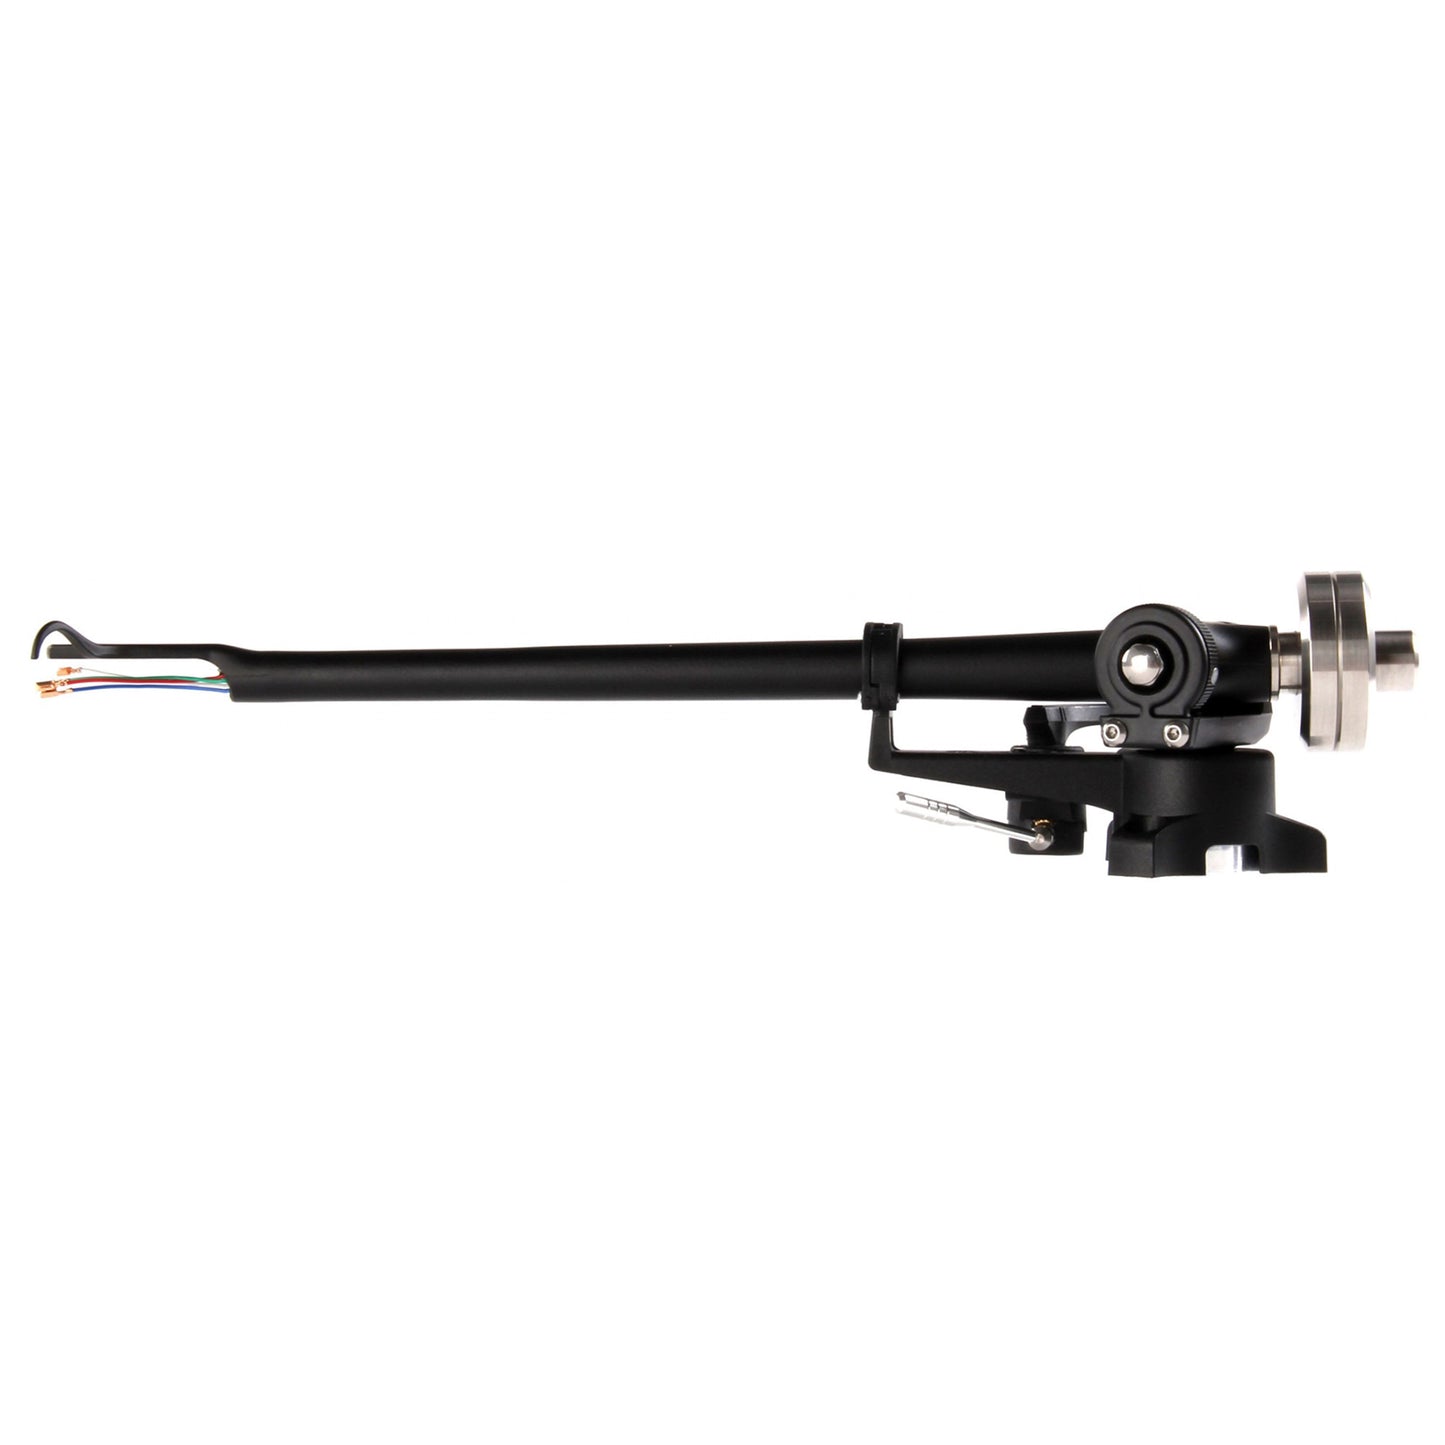
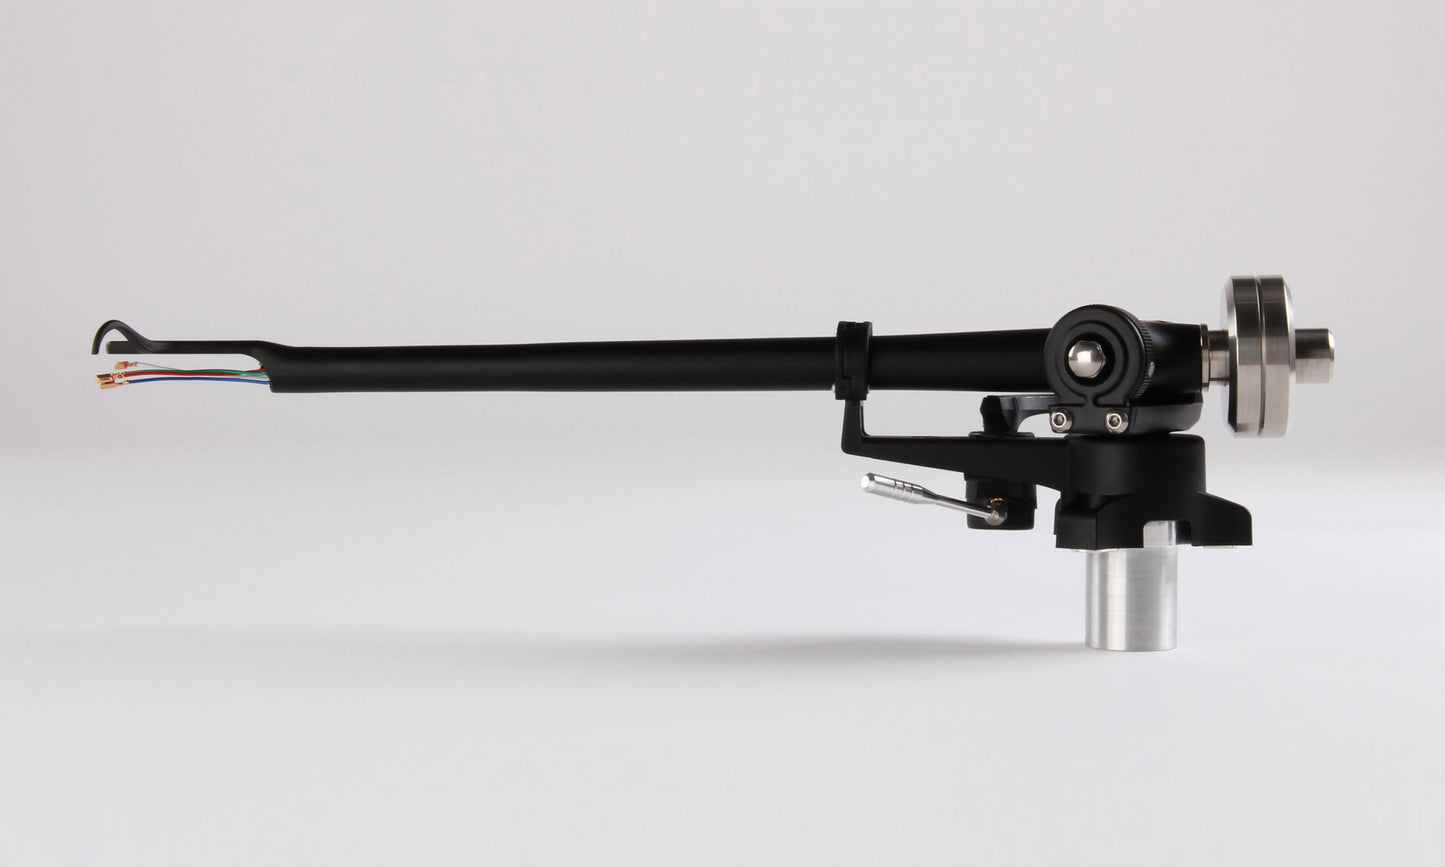
The Rega RB880 Tonearm draws on Rega's decades of experience to take performance to the next level using advanced techniques not available when their first in-house tonearm saw the light of day way back in 1983.
Designed using the latest 3D CAD & CAM technology, the new RB880 is the culmination of almost 40 years of tonearm design experience. This tonearm features a new aluminium vertical bearing housing, a redesigned sleeve and vertical bearing shaft (both manufactured from stainless steel) to improve mounting stability and overall rigidity. The RB880 also uses the latest Rega arm tube which has been completely redesigned to redistribute mass and further reduce stresses and resonances. This advanced design tube increases the stiffness and rigidity of the overall assembly using CAD design to blend the multiple varying tapers.
Rega is rightly famed for its tonearm designs. One unique characteristic of these designs is the achievement of near frictionless movement horizontally and vertically whilst having no measurable free play in the bearing assemblies. So, why has Rega dedicated so much time and invested so heavily in this area of tonearm design where the removal of even microns of movement has been pursued?
The answer is on the record. Look at a stereo vinyl LP under an electron microscope and you will see microscopic ridges and bumps that the diamond stylus of the pick-up cartridge tracks and reads. The length of a ridge depends on its frequency. The height is its amplitude. Towards the centre of an LP, a 10 KHz signal is just 26 microns long and if it's very quiet it may be less than 10 microns high. If your tonearm has 10 microns of movement within the bearing assemblies (and even very expensive tonearms usually have much more play and movement), reading the bumps will be difficult and musical vibration will be lost in arm movement. It is impossible to quantify exactly the musical distortion or loss of measured information. This is due to the random nature of pivot or bearing movement. However, it is easy to see that accurate measurement or tracking of a 10 micron bump is not possible if the tracking stylus can move randomly at least the same distance that it is trying to measure. Thus the importance of zero play in the bearings of a Hi-fi tonearm.
Externally the tonearm is fitted with a bespoke Rega designed low capacitance phono cable. Which uses an advanced phono plug assembly. This has only two parts to minimise joints and incorporates a twist and clamp design locking the plug to the terminal. The design increases connectivity and ensures the signal path is kept as clean as possible.
RB880 Set Up Instructions
Arm Balancing & Setup: With the cartridge correctly mounted and with the stylus guard removed, ensure that the tracking force dial and bias adjustment are set to zero. Adjust the balance weight until the arm is "floating", with the stylus approximately 1mm clear of the record.
Note: It is normal for the arm to swing back towards the arm clip position even with the bias set at zero. Therefore, it is advisable to gently hold the arm bearing carrier (just below the tracking dial) thus preventing horizontal movement during the balancing procedure.
Applying Tracking Pressure: Once the arm is balanced, rotate the tracking force adjustment dial to the required tracking force. Numbers '0' to '3' are marked on the dial. If in doubt, it is usually advisable to use a tracking force that corresponds with the upper limits of the cartridge manufacturer's range.
Applying Anti-Skating (Bias) Adjustment: Set the bias adjustment slider location to the same figure as the cartridge tracking force pressure quoted by your cartridge manufacturer. Note: This is not critical and a figure between 1.5 & 2.0 will normally be suitable for most cartridges.
Fitting Your Tonearm
The RB880 will directly replace any other Rega tonearm that currently uses the 3 point mounting, without any modification. If fitting to another manufacturer's product or an older Rega turntable (with the single point nut fixing), the supplied template should be used as a guide to ensure correct position and alignment. With so many variants in turntable models, it is important to contact your turntable manufacturer if in any doubt before making any holes in plinths or arm boards. Before attempting to fit the RB880 arm to the turntable, it is important to ensure that there is sufficient clearance beneath the turntable and that the arm does not hit the lid, top or sides. Having checked that there is sufficient clearance in all directions (including the maximum potential arm movement horizontal and vertical), the next step is to find the position of the centre of the arm mounting hole. The easiest way to do this will be to use the arm mounting template and the detailed mounting instructions supplied with the tonearm.
Our Take
With the RB880 Rega has set out to fine tune an icon using advanced techniques not available when the original RB300 was introduced way back in 1983. It takes a star turn on the extremely talented Planar 8 and is a key part of that turntable's excellent performance. A joy to set up and use the RB880 is a superb choice, whether purchased with a Rega turntable or used on something iconic from a bygone era.
Main Features & Specifications
- Design: 9" Tonearm as used on the Rega Planar 8 turntable
- Redesigned aluminium vertical bearing housing
- Redesigned sleeve
- Integrated arm clip
- Improved spring housing
- Rega's award winning low mass aluminium tonearm tube
- Extreme stability and almost friction free movement
- Hand selected bearings
- Effective Mass: Low / 11g
- Mounting Distance (platter centre to arm hole centre): 222mm
- Effective length: 236.5mm
- Offset Angle: 21.55°
-
Overhang: 14.5 mm
Note: Features & Specifications Subject To Change Without Notice. E&OE.
Product Reviews
Questions & Answers